How To Fix Your Headlight Switch {1984}

The following describes how I fixed the headlight switch on my 84 Nissan 300ZX Turbo. Symptoms: both headlights go up and down properly, both fog lights work, both headlights work on high beam, parking lights work, driver's side headlight does not work on low beam.
You should use all appropriate safety precautions when you work on your car. If this method doesn't work for you, or you screw your car up trying to follow my example, oh well, don't call me.
1) Remove the fuse for the horn.
2) Remove the 2 screws (phillips) from the bottom of steering wheel cover [see pic 1].
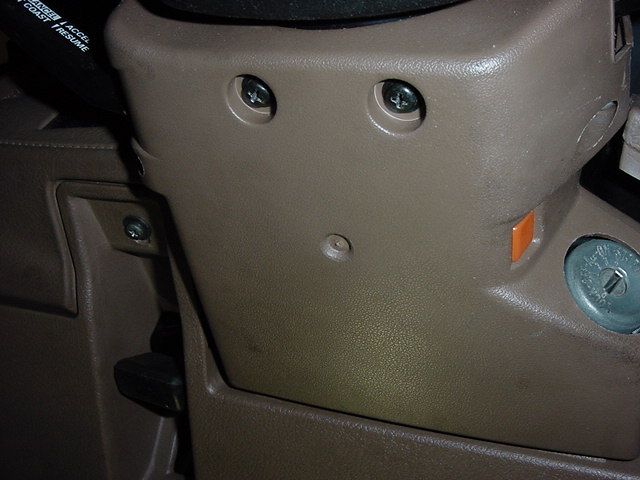 Pic1
Pic1
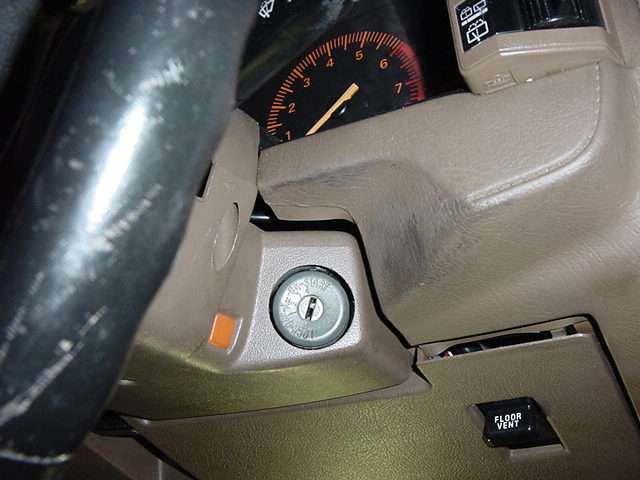
3) Remove the 2 screws (phillips) from the sides of the steering wheel cover - these connect the top of the cover to the bottom of the cover [see pics 2, 2b].
Remove the top and bottom halves of the cover (you may have to also remove or loosen the kick panel underneath the dash).
 Pic2
Pic2
 Pic2b
Pic2b
4) Remove the horn pad (they usually peel/pop off) [see pic 3].
 Pic3
Pic3
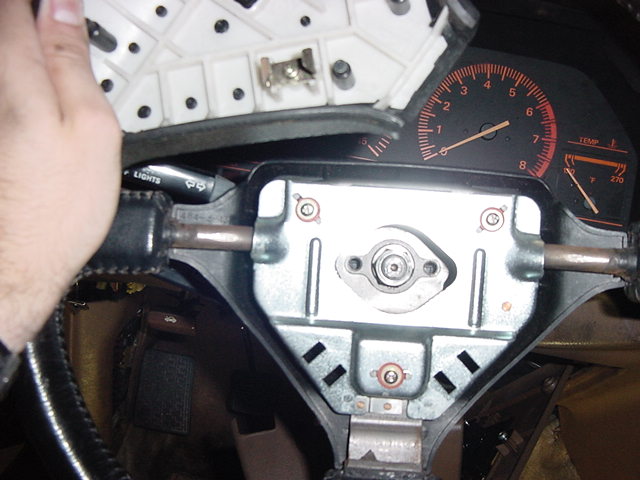
5) Remove the nut holding the steering wheel to the hub. This is a 19mm, you will probably need a deepwell socket and a breaker bar.
Except for the press-fit, the steering wheel is now free to come off. To disengage the press fit, use a steering wheel puller. I didn't
have a puller, I just beat on it from behind until it came off (results using that technique may vary!).
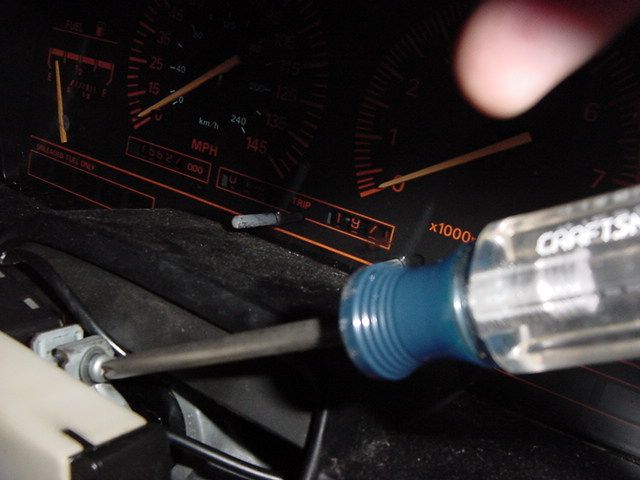
6) Loosen the screw for the clamp holding the wiper, headlight, and cruise control stalks in place. The screw for the clamp is
located in the 12 o'clock position [see pic 4].
 Pic4
Pic4
7) Depress the dash pod button that keeps the lights in the up position (less wear on the motor for the next few minutes).
Unplug the electrical connectors going to the wiper, headlight, and cruise control stalks. One of the plugs going into the headlight
switch goes far up under the dash. You have enough slack in the wiring to allow you to finish the job sitting in the car, so unless you're
a contortionist you can leave that one plugged in.
Remove the six small screws (phillips) holding the 3 switches to the white plastic plate/holder
[see pic 5].
 Pic5
Pic5
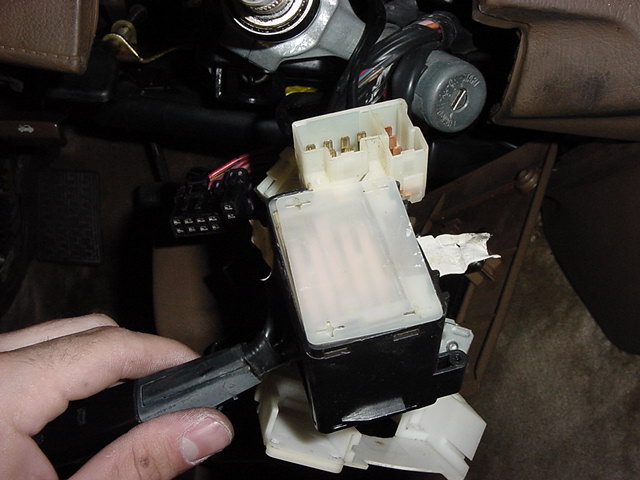
8) The switches are now free to slide out of the plastic plate/holder. The headlight switch has a translucent dust cover
on the back - pry it off [see pic 6].
 Pic6
Pic6
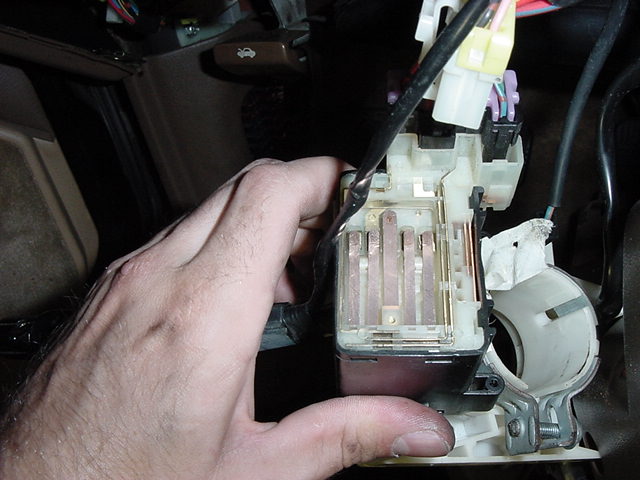
9) Underneath the dust cover, there are 5 long skinny copper contacts about 1" long and 1/8"
wide. These contacts are resting on little tiny plastic nubs poised just above
point contacts. When the light switch on the end of the stalk is rotated,
the plastic nubs are shifted down into the assembly, allowing the long skinny
copper contacts to touch the point contacts, thus completing the circuit. If the switch
is in your lap w/ stalk on the left and back facing up, the 1st contact on the left will
be low beam left hdlt, next will be low beam rt hdlt, middle is parking lights, next is
high beam lt hdlt, final one is high beam rt hdlt. I might have messed the order up just a
little but you get the idea [see pic 7].
 Pic7
Pic7
10) Take fine sandpaper and run it between the long skinny copper contacts and the
point contacts. It's a tight fit. This will clean some of the carbon off.
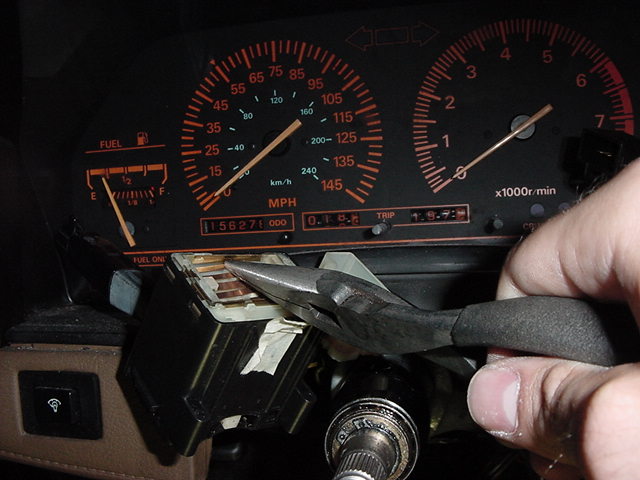
11) In my case my low beam left headlight was not working. With headlights switched to "on"
and the switch plugged back in, I could press down just a bit on the long skinny copper
contact on the far left and it would blink the left headlight low beam on. When I let off and quit pressing it
would blink back off. Which ever light isn't working for you, very carefully bend the
copper contact until the whole assembly is working properly. Care must be taken - bend too
much or in the wrong place and the new "kinks" in the contact will prevent it from EVER
making the connection, and you'll have to make a trip to the junkyard after all [see pic 8].
 Pic8
Pic8
12) Reassembly is basically the reverse of disassembly.
Tips:
- Mark the steering wheel position before you remove it. This will prevent you
from reinstalling it crooked.
- Every time the lights are switched on while the car is not running, the voice warning
kicks in to tell you the "LIGHTS ARE ON". If this tests your sanity, you may want to
unplug the voice warning box under the passenger seat (I never did find a fuse that would
quiet the lady down).
- You may want to consider this fix only temporary. This is the second time I've had to
do it, the last time was about 1 year ago.