Created : 990302
Last updated: 20000221
1) Loosen the lug nuts on the wheels corresponding to the brake pads you are planning to change.
2) Jack up the car (refer to How To for examples). Make sure you use wheel chocks and do not engage the emergency brakes.
3) Remove the wheels.
Front Brake Pads
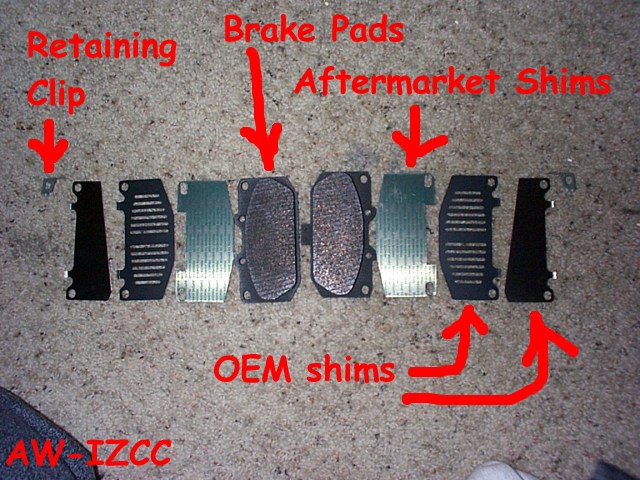
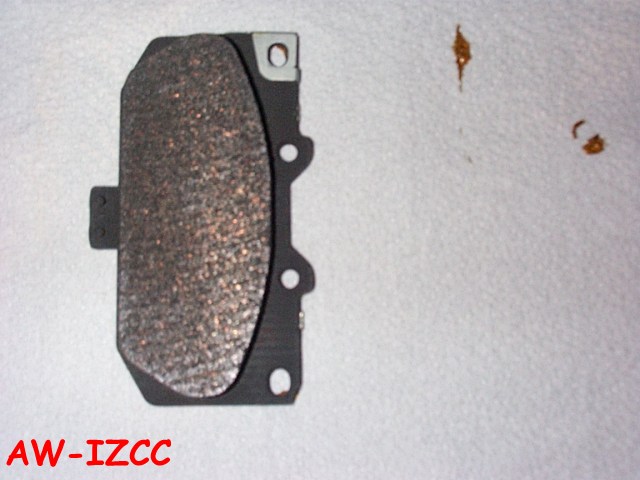
4) Lay out your new brake pads (and new brake kit if you ordered a new brake kit. The brake kit includes new shims in case your old ones are cracked or worn. But, I've seen others' who were cracked pretty bad. It's up to you whether or not you want to pull things apart and discover things are cracked and then go get a set, or get it anyways. In my case, I could have stuck with the old set).
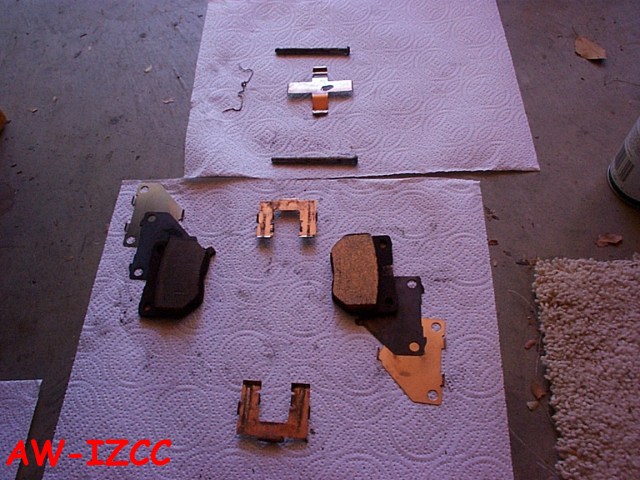
In this picture, the two pads are in the center of the picture, then going outwards, are the two shims that came with the aftermarket pads, then the two stock shims that come with the brake kit (or were there with the stock pads), and then the outside is the stock angular shim, and then finally, the small bracket that goes on the top of the pad assembly. I ended up using the aftermarket shim instead of the grilled stock shim. The aftermarket shim had adhesive on one side to stick to the back of the pads. (If your new brake pads only have one of the two pads with a wear indicator, put it on the inside of the caliper).
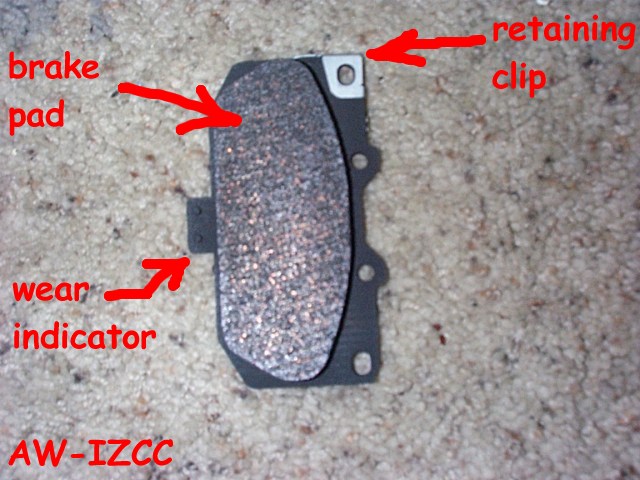
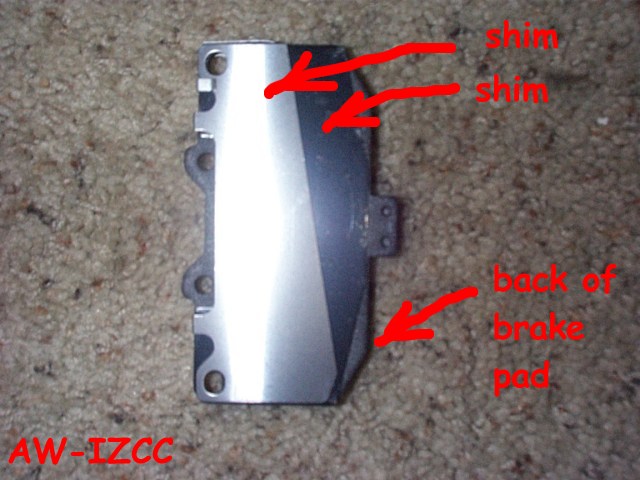
This is how your shims should look when assembled onto your new pads
:
Brake Pad Side (you can see the small 'assembly' bracket at the top
of the pad backing)
5) Remove the cap of your brake fluid reservoir off, and put some towels around it in case of overflow of brake fluid.

6) Turn the steering wheel so that the front of the brake caliper you are working on, is facing you as much as possible.
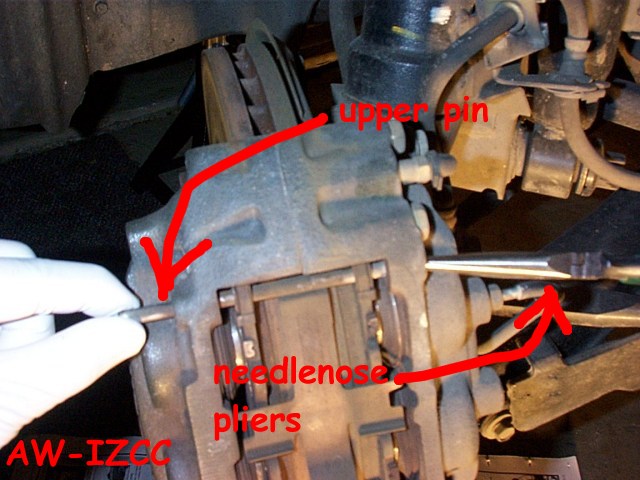
7) Remove the spring that hooks into the holes in the top and bottom pins. Use your fingers or a pair of needle nose pliers.

8) Using needle nose pliers, push from the inside on the pin and pull from the outside with your fingers. Remove the top pin. However, pull the pin out slowly and brace your fingers against the flat spring that will want to launch out at you.

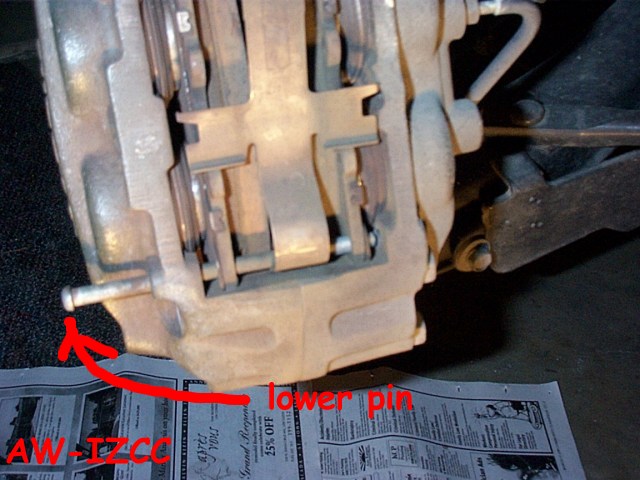
9) Then remove the bottom pin and the metal spring will fall out easily.
10) Grip the brake pad backing and pull it out (this will remove the brake pad and all it's shims). If it is tough to pull out, try wiggling it slowly by pulling a bit on the top part and then a bit on the bottom part. Remember to pull out both the inside pad and the outside pad on either side of the rotor.

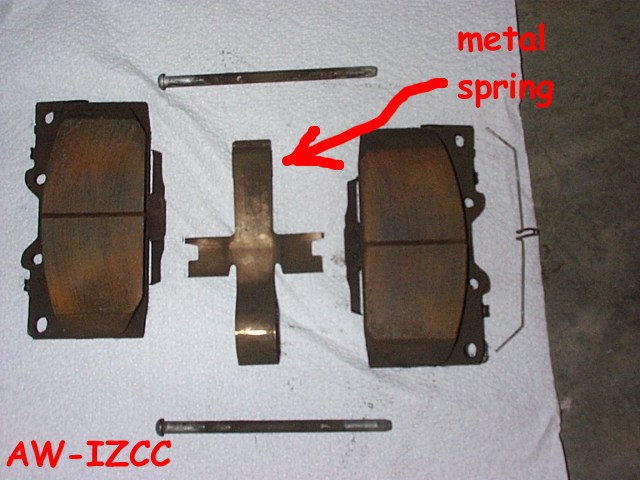
11) When removing the pieces from your caliper, lay them down on the ground so that you will remember how they go back. Here's a picture of what I did as an example.
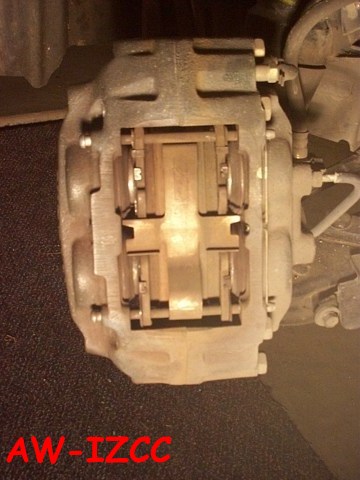
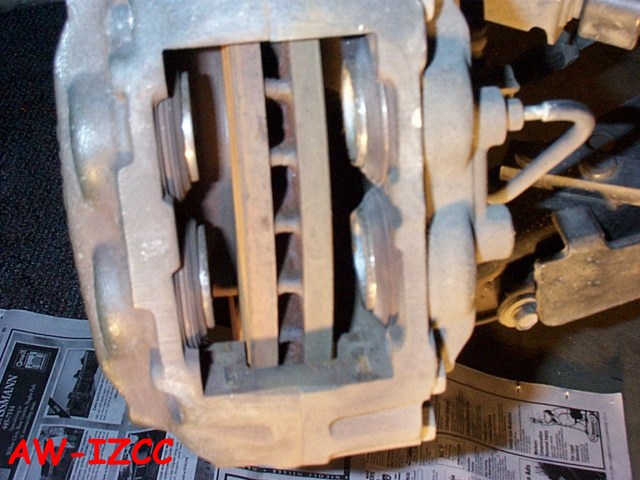
This is what your caliper will look like with the pads out.
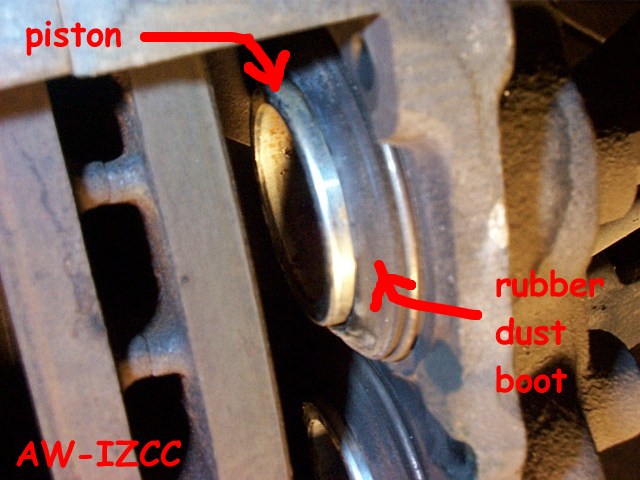
12) Now, if the old brake pads were quite worn, you will have difficulty in getting the new and THICKER brake pads back into that little space. This is where you'll have to push back on the pistons to make room. And this is why you removed the cap of the reservoir in case a lot of brake fluid gets pushed back up the system and overflows your reservoir. See the picture below, the shiney part is the piston and surrounding it is the rubber dust boot. You want to make sure to NOT damage the rubber dust boot and just 'squeeze' the piston back into the caliper.
This is my favorite 'persuader' tool. Got me out of a fix when I once overtightened my oil filter.
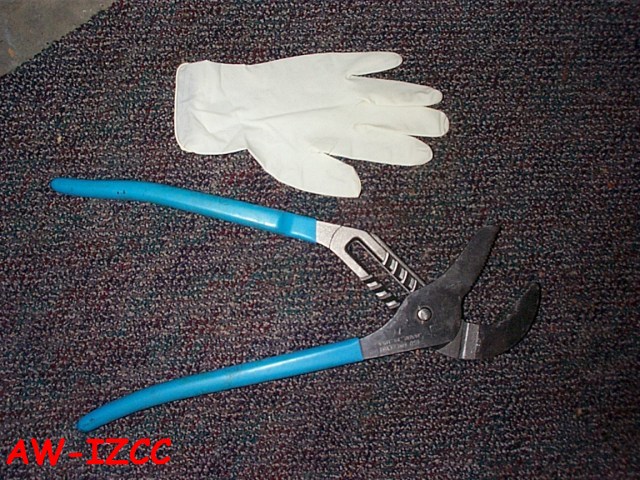
You should put tape around the persuader, or put cloth against the caliper if you are afraid of damaging the finish on the caliper. Firmly and slowly squeeze the pistons back in. You'll notice a see-sawing effect. As you squeeze one piston, the others will have a tendancy to come out a bit. But, just alternating squeezing the pistons will bring them all deep enough to fit in the new pads. Just go round and round squeezing the pistons until you have enough clearance.

13) Do a dry run but assembling the brake pads (WITHOUT greasing it yet), just to make sure you can fit both new brake pads in without any clearance problems.
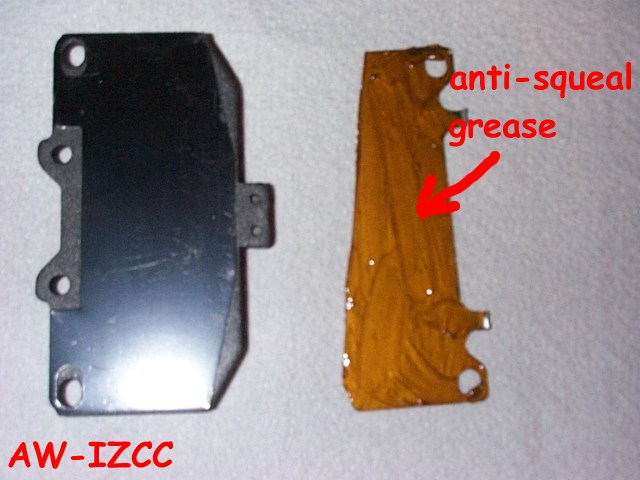
14) Ok, if you're sure that BOTH new brake pads will go in, start assembling the shims onto your brake pad and apply the anti-squeal grease on the shim. The grease stuff is pretty toxic, I always use latex gloves when working with this stuff.
Assembled and ready to go? Then drop them back in and just reverse the disassembly procedure. Put the pad assembly back in the caliper. Place the lower pin in first. Place the upper pin partially in, and then put the metal spring in place and tuck the top part of the metal spring underneath the top pin and push the top pin across completely. Insert the small spring on the inside of the caliper and hook the ends of the spring through the holes in the upper and lower pins. Put the wheels back on. Put the lug nuts back in. Lower the car back to the ground. re-torque your lug nuts to spec.
Rear Brake Pads
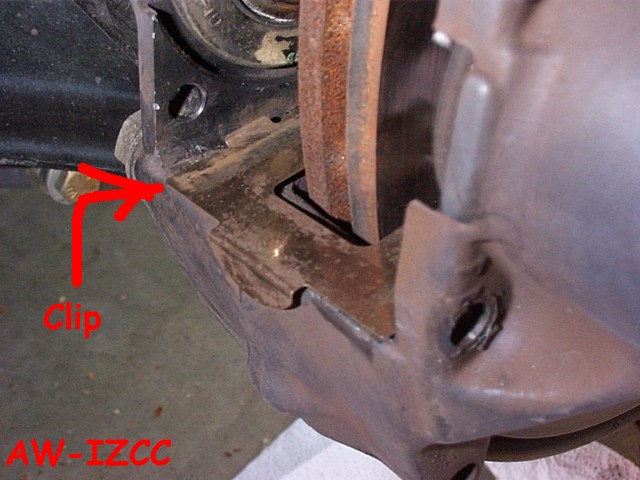
Pretty much follow the same procedure as the front pads, except the rear calipers only have two pistons total, versus the front calipers have four pistons. Also, the rear caliper has a top and bottom 'clip' that sits on the caliper and hangs on the caliper. The pads are slightly smaller and the shims have different shapes. But the concept and procedure is near identical.
Here's the clip seated on the calipers at the lip.